Smart Contact Form Setup
Note: Before setting up your Smart Contact Form, make sure you have set up your team’s Knowledge Base so the AI can answer customer questions based on your FAQ and other information you teach the AI about your business on the Knowledge Base page. Learn More
💡 You can access Smart Contact Form 'Sessions' in your Settings to see what submitted questions, which questions have been resolved by your AI automatically, and even abandoned questions from your customers which the Smart Contact Form captured.
Overview
Answer customer questions instantly and automatically using the Smart Contact Form. By setting up your Knowledge Base and installing the Smart Contact Form, your AI will answer customer questions directly on your website as customers are filling out your contact form.
Steps to install on Shopify
- Navigate to the Supermoon Settings (bottom left of your screen)
- Click ‘Smart Contact Form’
- Under Website URL, enter the domain of the website on which you wish to install the Smart Contact Form (example: businessname.com)
- Under Forwarding Email Address, add a forwarding address if you want to receive the Contact Form submissions in your existing email (Note: all submissions will also be saved in your Supermoon inbox for future reference)
- Click ‘Save’ (Note: you can customize colors, fonts, and other setting by clicking the ‘Show Advanced settings’ button)
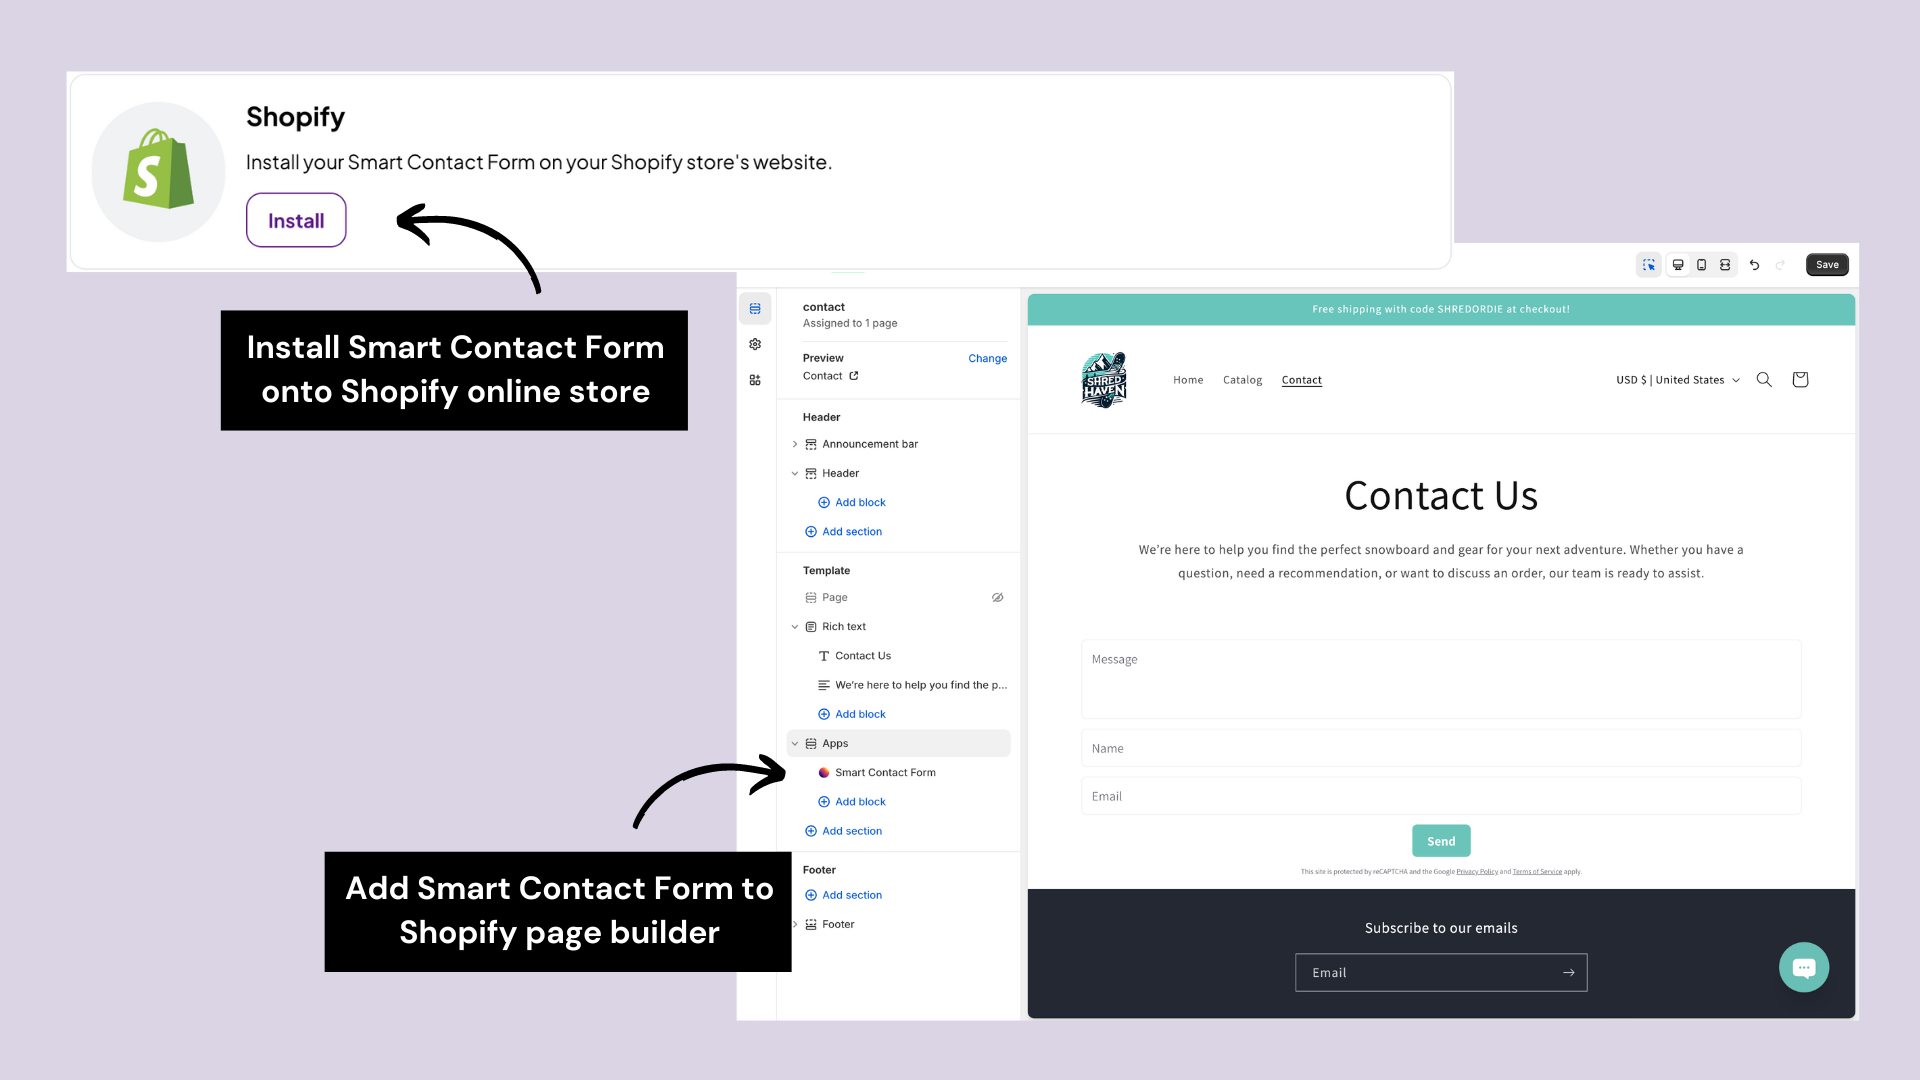
- If you have already linked your Shopify store, click ‘Install’
- If you have not connected your Shopify store, you can do so now by clicking ‘Link Shopify’
- Navigate to the page on your store where you would like to install the Smart Contact Form (e.g. the contact page), add a section to the page, under ‘Apps’ select the ‘Smart Contact Form’ to add it to the page
- Click ‘Save’ to save your changes – your contact form is all set!
Note: Make sure you spend time filling out your Knowledge Base with as much information about your business as possible so the AI can answer all types of customer questions. Learn More
Steps to install on WordPress
- Navigate to the Supermoon Settings (bottom left of your screen)
- Click ‘Smart Contact Form’
- Under Website URL, enter the domain of the website on which you wish to install the Smart Contact Form (example: businessname.com)
- Under Forwarding Email Address, add a forwarding address if you want to receive the Contact Form submissions in your existing email (Note: all submissions will also be saved in your Supermoon inbox for future reference)
- Click ‘Save’ (Note: you can customize colors, fonts, and other setting in the ‘Configure’ tab)
- Click the ‘Install’ tab at the top unless you want to add custom fields to your form. You can always come back and do this later
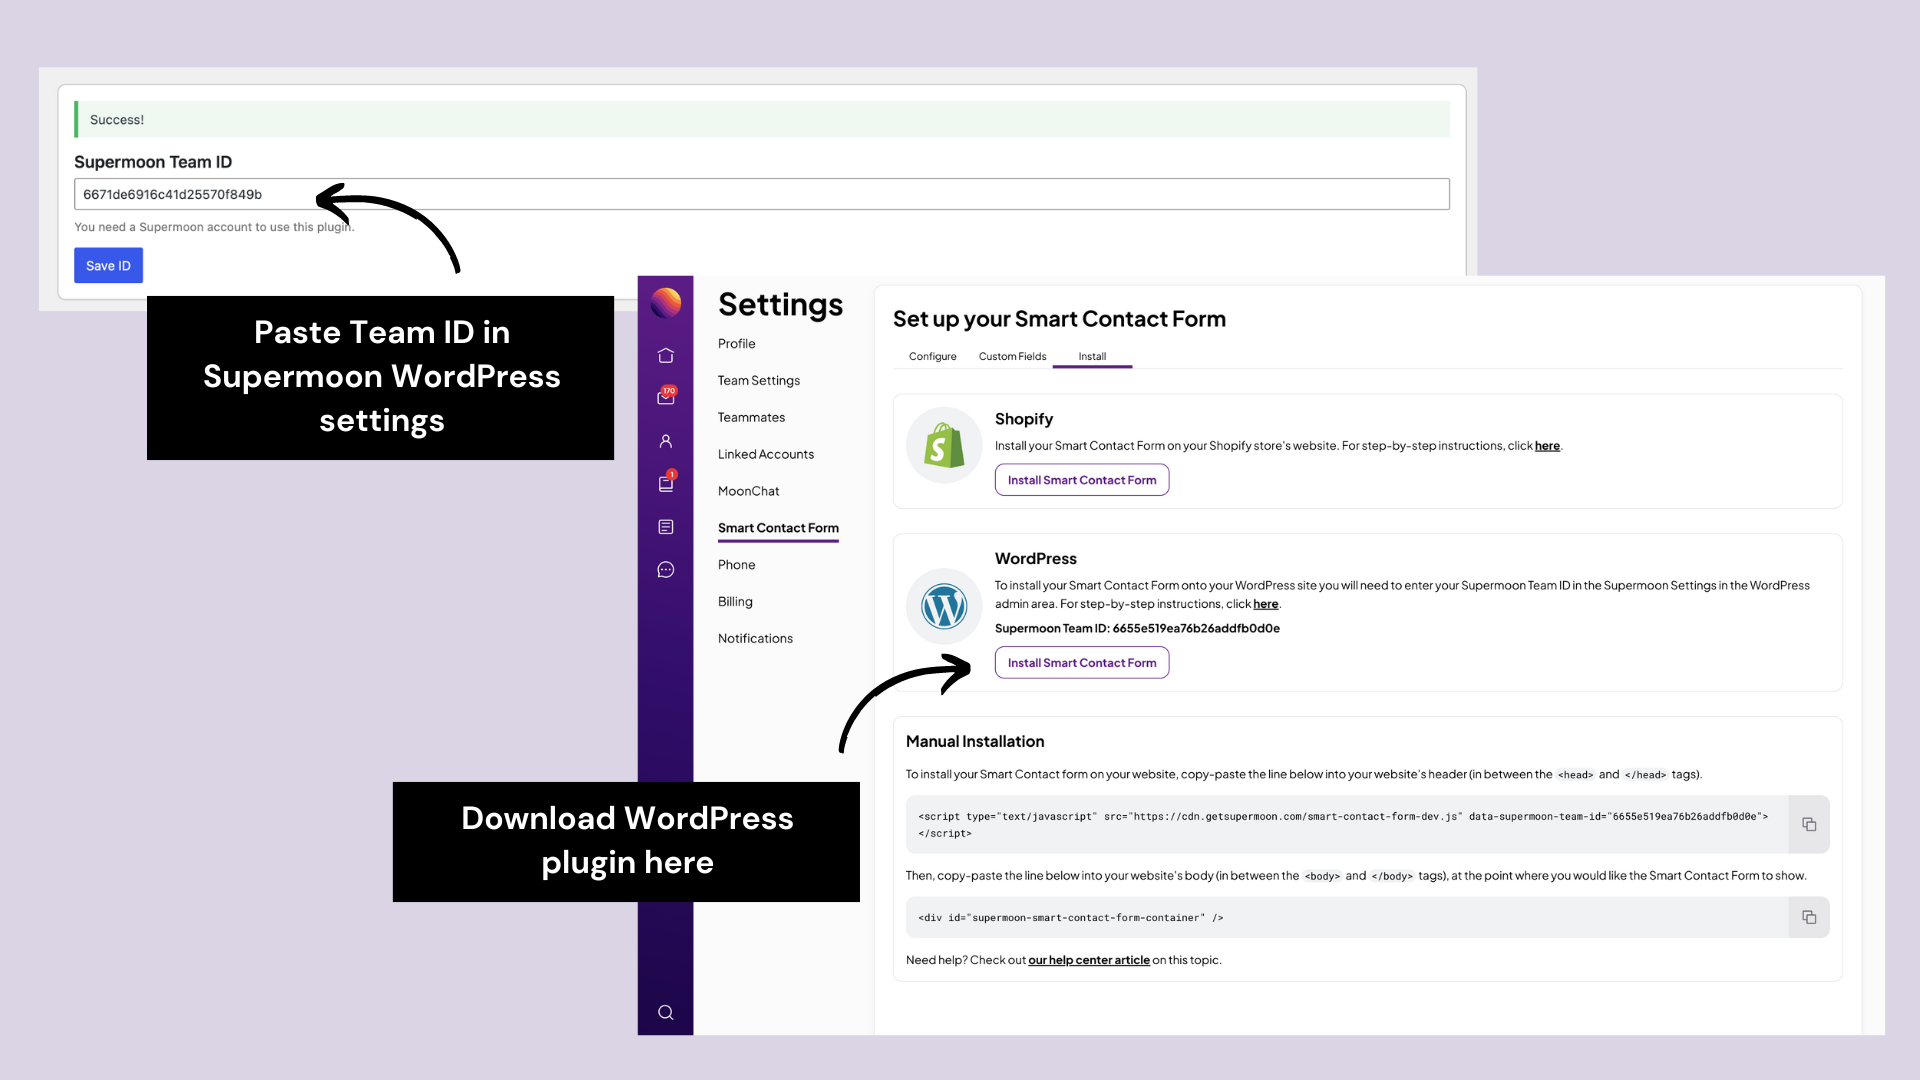
- In the WordPress section click the ‘Install Smart Contact Form’ button
- Download the latest ‘supermoon.zip’ file
- Upload the ‘supermoon.zip’ plugin via the manual installation method in your WordPress powered site
- Copy your ‘Team ID’ from the WordPress section in your Supermooon team settings and paste it in the WordPress settings page for the Supermoon plugin
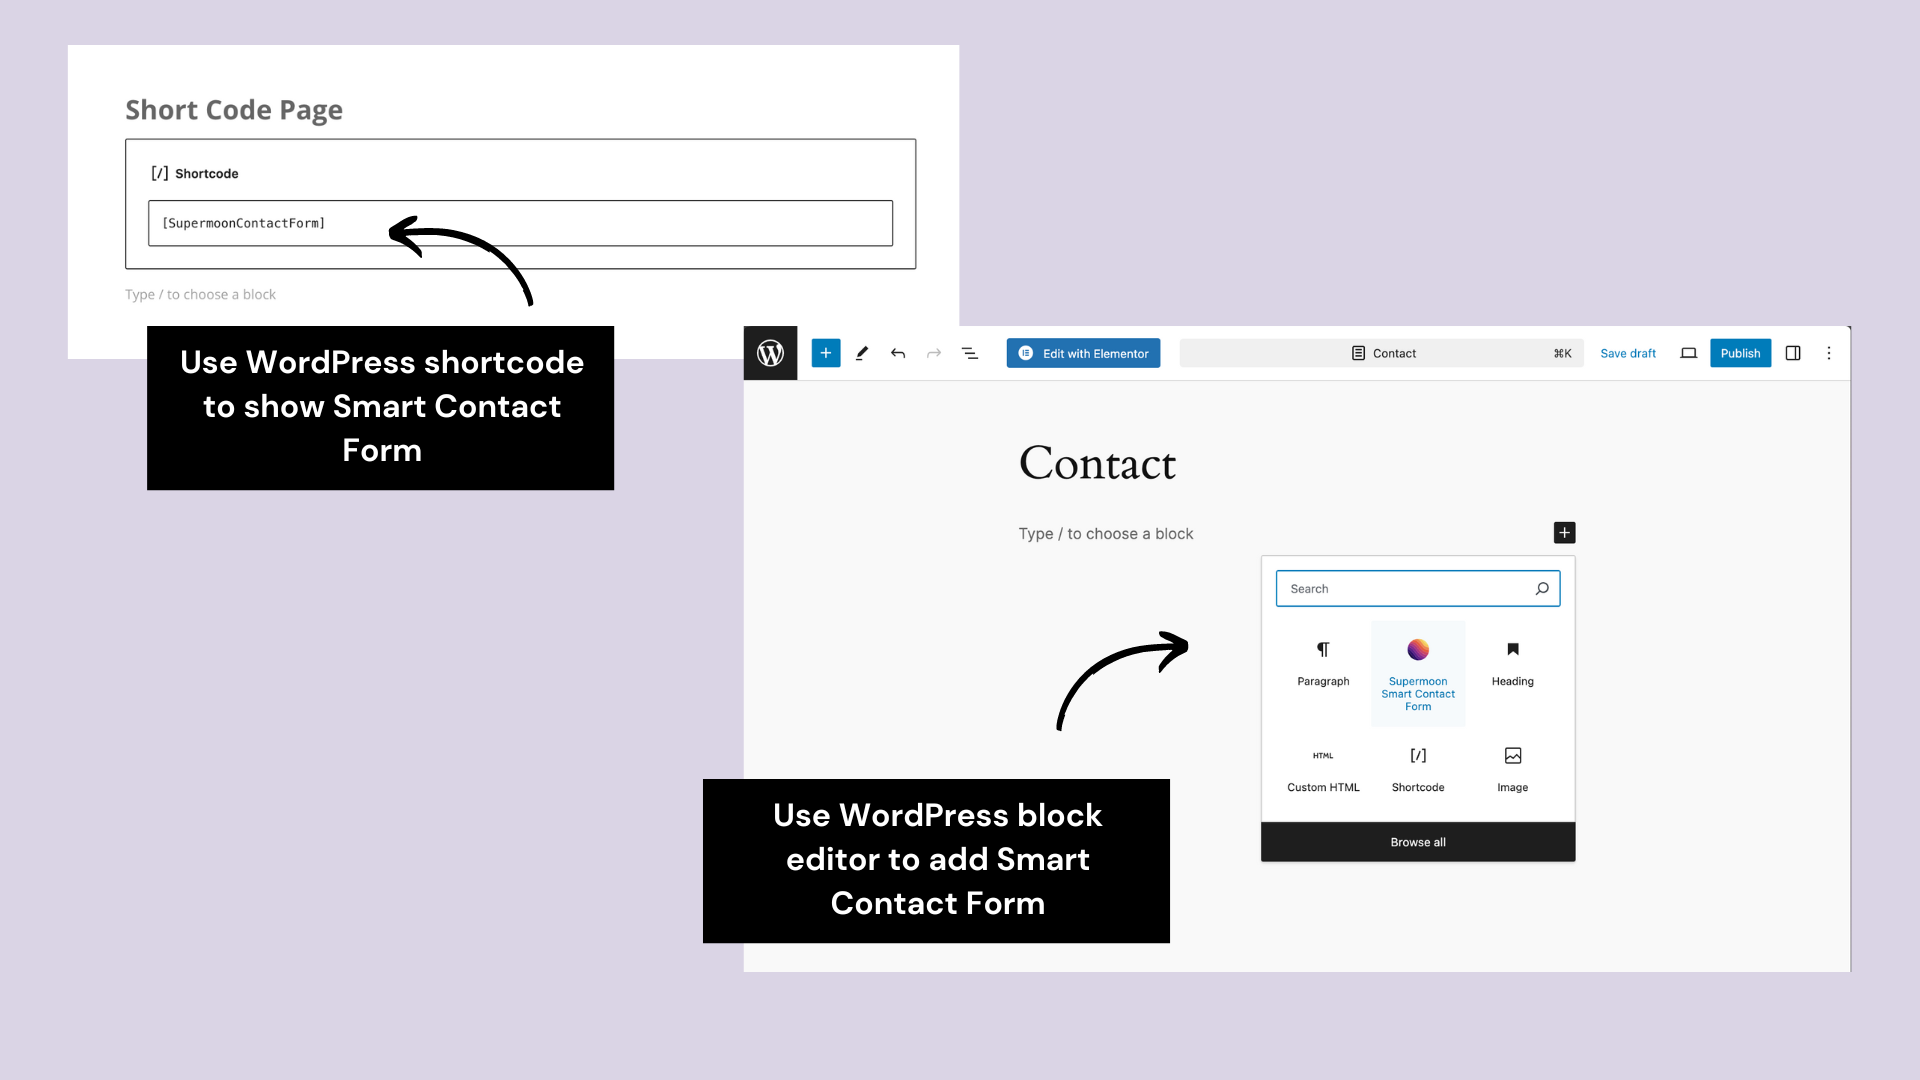
- Navigate to the page on your website where you would like to install the Smart Contact Form (e.g. the contact page) and use the Shortcode, Gutenburg Block Editor, Elementor Builder, or Divi Builder to display the Supermoon Smart Contact Form
- Need more help? Reach out to [email protected]
Download the WordPress plugin here.
Manual Installation
To manually install the Smart Contact Form on your website, copy-paste the code found in the install section of the Smart Contact Form page in your Supermoon settings into your website.
Configuration Settings
- Website URL: Here you can enter the URL of the website on which you will be installing the Smart Contact Form. If you’d like to use it on multiple websites, separate each URL with a comma.
- Button Color: Select the color for the button on the form.
- Width: Select how wide the Smart Contact Form should display on your website.
- Forwarding Email Address: By default, all Smart Contact Form submissions will show up in your Supermoon inbox. If you’d like to forward these submissions to an email address outside of Supermoon as well, enter it here. Separate multiple email addresses with a comma.
- Completion Message: Shown to the customer after they’ve submitted their message.
- Background Color: Select the background color behind the form.
- Alignment: Center or left alignment of the send button.
- Corners: Sharp or rounded corners for the edges of the form fields.
- Font: decide whether to use the font used on your website or whether to fall back to visiting customer operating system fonts.
- AI Suggestions (Pro Feature): Toggle ‘ON’ to give customers instant, automatic answers from your internal Knowledge Base as they’re filling out your Smart Contact Form.
- Product Recommendations (Pro Feature): Toggle ON to show relevant product recommendations to customers as they are filling out the Smart Contact Form.
- Show ‘Powered by Supermoon’ Footer (Pro Feature): Toggle this switch off to hide the ‘Powered by Supermoon’ footer at the bottom of the form.
- Enable Smart Contact Form: Toggle ON/OFF to enable or disable the contact form without fully uninstalling it.
Ready to get started?
Don't miss out on the opportunity to leverage the power of AI. Take the leap into the future now!
Try for free